


Proper installation of mechanical seals is crucial for optimal performance and longevity. Studies indicate that approximately 40-50% of mechanical seal failures arise from improper assembly and installation errors. Common issues include skipping compatibility checks, poor cleanliness, and incorrect seal compression. To ensure a successful mechanical seal installation, gather essential tools and materials. This preparation minimizes the risk of errors and enhances the reliability of the seal.
When it comes to a single spring seal setup, it’s important to follow specific guidelines. If you’re wondering how to install a pump shaft seal, make sure to review the mechanical seal fitting tips that can help streamline the process. Additionally, refer to the pump seal assembly instructions for detailed steps.
Tip: Always verify that the seal’s model and size match your equipment’s requirements before beginning the installation process. If you’re asking, “How do you install a single spring seal?” remember that careful attention to detail during installation will lead to better performance and durability.
Key Takeaways
- Proper installation of mechanical seals is vital. It prevents failures and enhances performance.
- Always verify the seal’s model and size before installation. This step ensures compatibility with your equipment.
- Maintain a clean workspace. A tidy area reduces contamination risks and supports successful installation.
- Follow a structured installation process. Adhering to detailed steps minimizes errors and improves seal longevity.
- Conduct thorough leak and operational tests after installation. These checks confirm the seal’s effectiveness and reliability.
Preparation
Safety Precautions
Before beginning the installation of a single spring mechanical seal, individuals must prioritize safety. Handling the new seal with care is essential to prevent damage. A thin layer of lubricant on the seal faces and outer diameter enhances the initial sealing performance. Proper alignment during installation is crucial; the spring side of the seal should face the fluid or pressure side. After installation, reassemble the equipment correctly and conduct leak tests to confirm the seal’s functionality.
Required Tools and Materials
Gathering the right tools and materials is vital for a successful installation. Below is a list of essential items:
- Precision measuring instruments: Ensure accurate measurements of the shaft and housing.
- Torque wrenches: Use these to apply the correct amount of force during reassembly.
- Cleaning materials: Lint-free cloths and appropriate solvents help maintain cleanliness.
- Replacement parts: Keep all necessary components in contamination-free containers.
Cleanliness and Workspace Setup
A clean workspace minimizes contamination risks during installation. Follow these steps to prepare the area:
- Ensure the workspace is clean and free from dust and contaminants.
- Select appropriate tools, including precision measuring instruments and torque wrenches.
- Prepare cleaning materials like lint-free cloths and solvents.
- Verify the availability of all replacement parts in contamination-free containers.
- Maintain adequate lighting and ergonomic access to components.
- Control the temperature to prevent thermal expansion or contraction.
By adhering to these preparation steps, individuals can significantly reduce the likelihood of installation errors and enhance the performance of the mechanical seal.
Disassembly
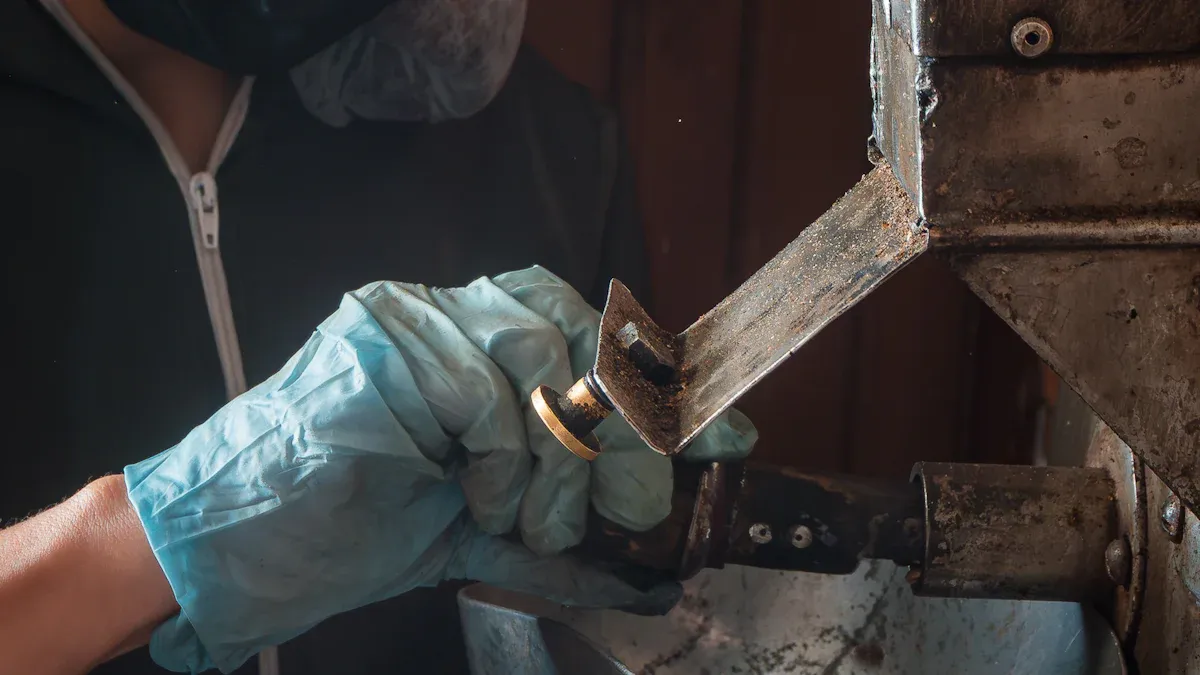
Removing the Old Seal
Removing the old mechanical seal requires careful handling to avoid damaging the equipment. Follow these recommended procedures:
- Avoid using a hand hammer or spade blade when removing the mechanical seal. These tools can easily damage the sealing element.
- Exercise caution if there are mechanical seals on both sides of the pump. Disassembly errors can lead to complications.
- For working mechanical seals, if the sealing surface moves when the gland is loose, replace the static and dynamic ring parts. Reusing them may alter the original running track and damage the sealing contact surface.
- If the sealing element is contaminated, remove any dirt or condensate before proceeding with the removal of the mechanical seal. This step ensures a clean working environment.
By adhering to these steps, individuals can effectively remove the old seal without causing harm to the surrounding components.
Inspecting Surrounding Components
After removing the old seal, it is essential to inspect the surrounding components for signs of wear or damage. Look for the following indicators:
- Visible fluid around the seal area suggests seal failure.
- Small droplets at shaft exits or housing joints indicate a loss of proper contact with mating surfaces.
- Fresh fluid accumulation points to active leaking, while dried residue signifies past leakage.
Additionally, check for alignment issues:
- Improper alignment can cause uneven wear and vibration.
- Excessive vibration, often due to worn bearings, can lead to seal face separation.
- Shaft misalignment may result in uneven wear and vibration, while cavitation can also damage the seal.
Conducting a thorough inspection of these components ensures that any underlying issues are addressed before installing the new mechanical seal. This proactive approach enhances the overall reliability and performance of the sealing system.
Cleaning and Inspection
Cleaning the Seal Area
Before installing the new mechanical seal, individuals must thoroughly clean the seal area. This step ensures that contaminants do not compromise the seal’s performance. Use the following cleaning agents to prepare the surfaces effectively:
| Cleaning Agent | Description |
|---|---|
| Lint-free cloths | Used to wipe down surfaces to prevent contamination during installation. |
| Isopropyl alcohol | A compatible solvent for cleaning that does not degrade elastomers. |
| Mineral spirits | Another solvent option that is safe for cleaning sealing surfaces. |
| Non-abrasive brushes | Useful for scrubbing without damaging the surfaces being cleaned. |
To achieve optimal cleanliness, follow these guidelines:
- Thoroughly clean all parts in contact with the seal using appropriate cleaning agents and lint-free cloths.
- Ensure all sealing surfaces are pristine by using clean, lint-free cloths and suitable solvents.
- Clean and prepare shaft and housing surfaces to remove contaminants effectively.
Inspecting for Damage
After cleaning, inspect the seal area and surrounding components for any signs of damage. This inspection is crucial for ensuring the longevity and effectiveness of the new seal. Look for the following indicators:
- Cracks or chips on the sealing surfaces can lead to leaks.
- Worn or uneven surfaces may indicate misalignment or excessive wear.
- Corrosion or pitting on metal components can compromise the seal’s integrity.
Addressing any identified issues before installation is essential. If damage is present, consider replacing the affected components to prevent future failures. A thorough inspection helps maintain the reliability of the sealing system and enhances overall performance.
By following these cleaning and inspection steps, individuals can ensure a successful installation of the single spring mechanical seal, minimizing the risk of future complications.
Installation Steps
Mechanical Seal Installation
The installation of a single spring mechanical seal requires careful attention to detail. Follow these step-by-step procedures recommended by manufacturers to ensure a successful installation:
- Prepare the Pump: Begin by locking out the pump. Remove the old seal, clean the stuffing box, and inspect for wear.
- Inspect the Seal: Verify the size and condition of the new seal. Apply lubricant to the O-rings to facilitate a smooth installation.
- Install the Cartridge Seal: Slide the seal onto the shaft and into the stuffing box. Ensure that it fits snugly without excessive force.
- Align and Secure: Finger-tighten the gland bolts to hold the seal in place. Use a torque wrench to apply the correct amount of force during tightening.
- Remove Setting Clips: After securing the seal, carefully remove all setting clips to allow the seal to function properly.
- Final Checks: Rotate the shaft to ensure smooth movement. Check for leaks after re-pressurizing the system.
By following these steps, individuals can effectively install the mechanical seal, reducing the risk of future failures.
Lubrication of the New Seal
Proper lubrication is critical for the effective operation of mechanical seals. Neglecting this step can lead to severe consequences. Here are key points regarding lubrication:
- Mechanical seals require adequate lubrication to function effectively. Running a seal dry, even briefly, can cause permanent damage to the seal faces.
- Many technicians overlook the importance of pre-lubricating the seal faces before startup, risking significant damage.
- Proper lubrication through the seal fluid or flush system is essential. It helps prevent dry running and overheating of seal faces.
To ensure optimal performance, apply a compatible lubricant to the seal faces during installation. This practice minimizes friction and protects the components.
Proper Positioning of the Seal
Correct positioning of the mechanical seal is vital for its performance. Follow these guidelines to achieve proper placement:
- Clean the Shaft and Housing: Ensure all residues are removed to prevent interference with the seal’s function.
- Apply Lubricant (If Required): Use compatible lubricants to reduce friction and protect components during installation.
- Secure the Stationary Seat (If Required): Utilize locking mechanisms like set screws or clamp collars to maintain the seal’s position.
By adhering to these positioning guidelines, individuals can enhance the reliability and longevity of the mechanical seal.
Securing the Seal in Place
Securing the mechanical seal in place is a critical step in the installation process. Properly fastening the seal ensures that it maintains its position and functions effectively under operational conditions. Follow these guidelines to secure the seal correctly:
- Use the Correct Fasteners: Always utilize the fasteners specified by the manufacturer. These components are designed to withstand the operational pressures and prevent loosening over time.
- Tighten in a Cross-Pattern: When securing the gland bolts, tighten them in a cross-pattern. This method distributes pressure evenly across the seal, reducing the risk of distortion or damage.
- Apply the Recommended Torque: Use a torque wrench to apply the manufacturer’s recommended torque settings. Over-tightening can lead to seal failure, while under-tightening may result in leaks.
- Check for Proper Alignment: After securing the seal, verify that it remains aligned with the shaft and housing. Misalignment can cause uneven wear and premature failure.
- Inspect for Gaps: Ensure there are no gaps between the seal and the housing. Any space can lead to fluid leakage and compromise the seal’s effectiveness.
- Perform a Final Inspection: After securing the seal, conduct a thorough inspection. Look for any signs of misalignment or improper fastening. This step is crucial before reassembling the equipment.
By following these steps, individuals can effectively secure the mechanical seal in place, enhancing its performance and longevity. Proper securing is an integral part of the overall mechanical seal installation process, contributing to the reliability of the sealing system.
Reassembly
Tightening Procedures
After installing the single spring mechanical seal, reassembly involves returning any removed parts, such as the pump cover or housing cap. Technicians must use wrenches to tighten the bolts or nuts to the specified torque. Careful attention is essential to avoid over-tightening, which can damage components, or under-tightening, which may lead to leaks.
To assist with this process, the following table outlines the recommended torque values for various bolt types during reassembly:
| Bolt Type | Torque Value (Nm) |
|---|---|
| Penetrators | 3.5 |
| End-cap bolts | 0.6 |
| M5 screws | 2.5 (max) |
Following these torque specifications ensures that the mechanical seal operates effectively and minimizes the risk of future failures.
Alignment Checks
Proper alignment is crucial for the effective operation of the mechanical seal. After reassembly, technicians should perform several alignment checks to ensure optimal performance. Key checks include:
- Axial and radial runout: Verify these measurements to confirm proper alignment.
- Positioning of the cartridge seal: Ensure it sits correctly within the seal chamber to prevent premature wear.
- Verification of axial positioning: Use measuring tools to confirm the correct distance from reference surfaces.
- Radial alignment: Check for concentricity with the shaft centerline and seal chamber bore.
By conducting these alignment checks, technicians can enhance the reliability and longevity of the mechanical seal, ensuring it functions as intended.
Final Testing
Checking for Leaks
After completing the installation of the single spring mechanical seal, it is essential to conduct thorough leak checks. This step ensures that the seal functions correctly and prevents potential failures. Follow these recommended procedures:
- Start the Equipment: Begin by running the equipment for a few minutes. This initial operation allows the seal to settle into place.
- Visual Inspection: Check for any signs of leaks around the seal area. Look for fluid accumulation or dampness that may indicate a failure.
- Pressurize the System: Introduce the process fluid into the equipment. Monitor the seal area closely for any leaks during this phase.
- Use Absorbent Paper: Place absorbent paper around the seal to detect small leaks. This method can reveal minor issues that may not be visible to the naked eye.
- Evaluate Leak Rate: Compare the observed leak rate against acceptable limits defined by industry standards. If leaks exceed these limits, further investigation is necessary.
Conducting pressure testing of the completed seal assembly is also advisable. Ensure that the testing occurs at pressures exceeding normal operating conditions. During this test, perform visual inspections to identify potential leak paths.
Tip: Common causes of leaks include improper installation, shaft runout, and inadequate lubrication. Addressing these issues promptly can prevent future complications.
Operational Testing
Once leak checks are complete, operational testing verifies the correct installation of the mechanical seal. This testing phase ensures that the seal operates efficiently under actual working conditions. Recommended tests include:
| Test Type | Description |
|---|---|
| Manual Rotation Test | Rotate the shaft 2-3 full turns to check for smoothness and resistance, indicating proper installation. |
| Leakage and Temperature Check | Start at low speed, monitor for leaks, and ensure temperature remains within recommended limits. |
| Record Installation Data | Document model, installation date, torque values, and initial test results for future reference. |
During operational testing, technicians should also monitor performance benchmarks. These benchmarks include alignment, vibration levels, and seal face squareness. Proper alignment must be within 0.050 mm (0.002″) to ensure optimal performance. Additionally, the shaft should not exhibit excessive deflection, with a maximum of 0.025 mm (0.001″) at the seal face.
By conducting these final tests, technicians can confirm the reliability and effectiveness of the mechanical seal installation. This thorough approach minimizes the risk of future failures and enhances the overall performance of the sealing system.
In summary, the installation of a single spring mechanical seal involves several critical steps. Key points include:
| Key Point | Description |
|---|---|
| Pre-installation Preparation | Verify equipment and components, check compatibility, and inspect for damage. |
| Tool Preparation | Gather necessary tools such as measuring tools, torque wrenches, and installation tools. |
| Work Area Preparation | Clean and organize the work area to minimize contamination risks. |
| Step-by-Step Installation | Follow a structured procedure for installing the mechanical seal, ensuring alignment and cleanliness. |
Following each step carefully is essential to avoid potential risks, such as using the wrong lubrication or misalignment, which can lead to seal failure. If uncertainties arise during installation, seeking professional assistance can ensure optimal performance and longevity of the mechanical seal.
Tip: Proper installation techniques enhance the reliability and lifespan of mechanical seals, making adherence to guidelines crucial for success.
FAQ
What is a single spring mechanical seal?
A single spring mechanical seal is a sealing device that uses a single spring to maintain contact between the seal faces. It prevents fluid leakage in rotating equipment, such as pumps and mixers.
How do I know if my mechanical seal needs replacement?
Signs of a failing mechanical seal include visible leaks, unusual noises, and excessive vibration. Inspect the seal area for fluid accumulation or wear on the sealing surfaces.
Can I install a mechanical seal myself?
Yes, individuals with basic mechanical skills can install a mechanical seal. However, following the manufacturer’s guidelines and ensuring proper alignment is crucial for successful installation.
What lubricants are suitable for mechanical seals?
Use compatible lubricants recommended by the seal manufacturer. Common options include water-based lubricants or specific oils that do not degrade elastomers.
How often should I check my mechanical seals?
Regular inspections are advisable, especially in high-stress applications. Check seals at least every six months or more frequently in demanding environments to ensure optimal performance.
Post time: May-23-2026