


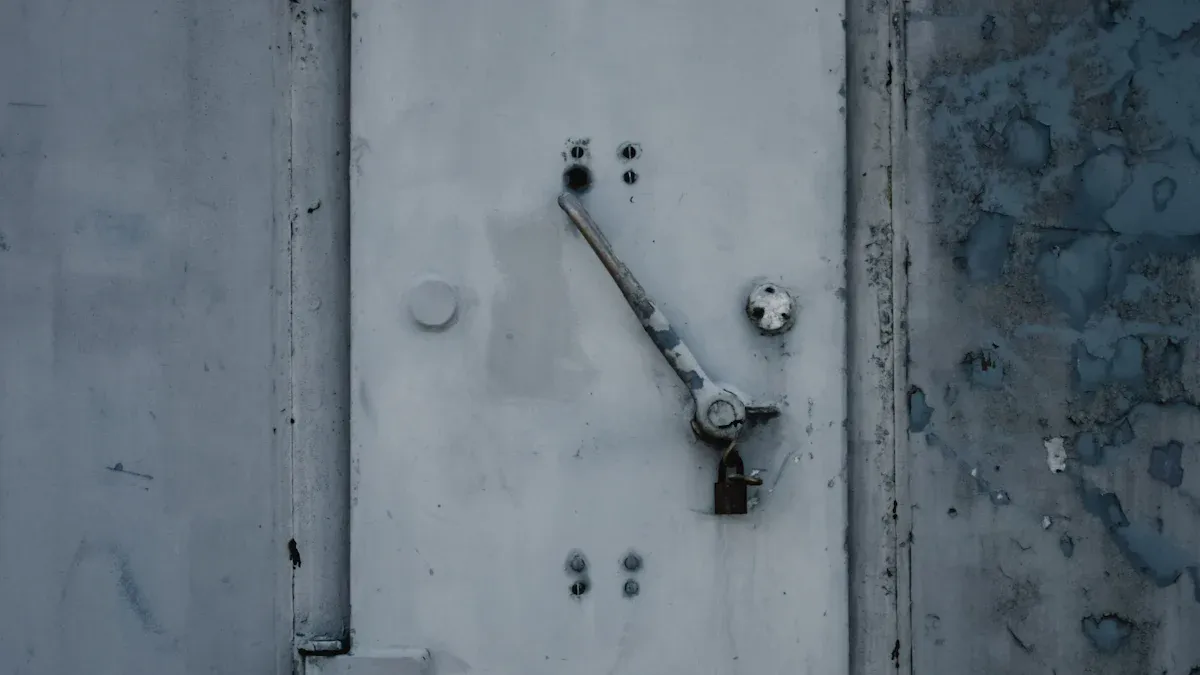
Proper Mechanical Seal Installation of a single spring mechanical seal is crucial for ensuring optimal performance and longevity. According to industry studies, improper installation accounts for 10-50% of mechanical seal failures. Common issues include:
- Skipping compatibility and condition checks.
- Poor cleanliness leading to contamination.
- Ignoring coaxiality and shaft runout.
To successfully complete the installation, gather essential seal installation tools such as wrenches, lubricants, and cleaning materials. When following the mechanical seal fitting instructions, remember to consider how to replace a pump seal effectively. Additionally, understanding how do you seat a mechanical seal is important, and using lubricant for seal installation is vital to avoid damage during the seating process.
Key Takeaways
- Gather all necessary tools before starting the installation. This includes wrenches, lubricants, and cleaning materials to ensure a smooth process.
- Always wear appropriate safety gear during installation. Safety goggles, gloves, and steel-toed boots protect against potential hazards.
- Review the manufacturer’s instructions carefully. Following these guidelines minimizes errors and enhances the longevity of the mechanical seal.
- Clean the seal housing thoroughly before installation. A clean environment prevents contamination and ensures optimal sealing performance.
- Monitor the operational performance after installation. Regular checks for leaks and unusual noises help identify issues early, preventing costly downtime.
Preparation and Safety Checks
Gather Necessary Tools
Before starting the mechanical seal installation, gather all necessary tools. Having the right tools on hand simplifies the process and reduces the risk of errors. Essential tools include:
- Wrenches
- Screwdrivers
- Lubricants
- Cleaning materials
- Torque wrench
Using the correct tools ensures that the installation proceeds smoothly and efficiently.
Safety Gear and Precautions
Safety should always be a priority during mechanical seal installation. Workers must wear appropriate safety gear to protect against potential hazards. Recommended safety gear includes:
- Safety goggles
- Gloves
- Steel-toed boots
- Hearing protection
Additionally, it is crucial to follow safety precautions. Ensure the work area is clean and free of obstructions. Proper ventilation is necessary, especially when working with lubricants or cleaning agents.
Tip: Skipping safety checks can lead to severe consequences. Over 70% of mechanical seal failures are linked to incorrect installation, dry running, or misalignment. A face temperature above 80 °C can degrade the lubricating film within seconds. Monitoring axial vibration and temperature can help anticipate up to 60% of these failures.
Review Manufacturer Instructions
Each mechanical seal comes with specific manufacturer instructions. Reviewing these instructions is vital for a successful installation. The instructions provide essential information regarding:
- Compatibility with equipment
- Recommended installation procedures
- Maintenance guidelines
Following the manufacturer’s guidelines minimizes the risk of errors and enhances the longevity of the mechanical seal. Proper preparation and adherence to safety protocols set the foundation for a successful mechanical seal installation.
Disassembly of the Old Seal
Shut Down Equipment
Before beginning the disassembly process, it is essential to shut down the equipment properly. Follow these steps to ensure safety:
- Power Off the Equipment: Disconnect the power supply to prevent accidental start-up.
- Drain the Fluid: Remove any fluid from the system to avoid spills and gain access to the mechanical seal.
- Isolate the Equipment: Lock out the equipment to ensure no one can accidentally turn it on during the disassembly.
Taking these precautions minimizes risks and prepares the workspace for the removal of the old seal.
Remove the Old Seal
Once the equipment is safely shut down, proceed to remove the old seal. Carefully follow these steps:
- Access the Seal: Remove any components that hold the seal in place.
- Extract the Old Seal: Gently pull out the old seal, ensuring not to damage the surrounding components.
This step requires attention to detail. Any damage to the housing or shaft can lead to complications during the installation of the new seal.
Inspect Surrounding Components
After removing the old seal, inspect the surrounding components thoroughly. This inspection is crucial for ensuring a successful mechanical seal installation. Consider the following:
- Seal Compatibility Check: Confirm that the new mechanical seal is suitable for the fluid and equipment specifications.
- Component Inspection: Look for damage or wear in all seal components, including faces and elastomers.
- Shaft and Housing Inspection: Check for any damage that could affect seal alignment.
- Dimensional Verification: Use precision tools to confirm critical dimensions for proper installation.
Conducting a thorough inspection helps identify potential issues that could affect the performance of the new seal. Addressing these concerns before installation will enhance the longevity and reliability of the mechanical seal.
Cleaning and Inspection of Components
Clean the Seal Housing
Cleaning the seal housing is a critical step in the mechanical seal installation process. A clean environment ensures optimal sealing performance. Follow these steps to prepare the housing:
- Remove any debris, residue, or remnants of previous seals.
- Use a lint-free cloth to wipe down the housing thoroughly.
- Consider using effective cleaning agents such as:
- Solvent-based cleaners for stubborn residues.
- Mild detergents for general cleaning.
- Compressed air to blow out dust and particles.
Ensuring the sealing chamber is free from contaminants will significantly enhance the new seal’s performance.
Inspect the Shaft and Housing
After cleaning, inspect the shaft and housing for any signs of wear or damage. This inspection is vital for ensuring a successful installation. Key areas to check include:
- Visible Oil Leakage: Look for oil pooling around the seal, which may indicate seal degradation.
- Unusual Noise or Vibration: Increased friction can cause noise or vibration during operation.
- Contamination Inside the System: Discoloration of oil or presence of metal particles suggests seal compromise.
- Shaft Wear or Scoring: Inspect for grooves or scratches on the shaft surface that may affect seal performance.
- Seal Lip Hardening or Cracking: Check for hardening or cracking of the seal lip due to exposure to heat or chemicals.
Conducting a thorough inspection helps identify potential issues that could affect the new seal’s performance.
Check for Wear and Damage
During the inspection, pay close attention to common types of wear and damage. The following table summarizes typical issues found:
| Inspection Area | Common Issues Found |
|---|---|
| Seal Components | Cracks, chips, scratches, hardness, flexibility, aging signs in elastomers, rust or deformation in springs. |
| Shaft and Housing | Eccentricity, ovality, surface defects, misalignment, wear, and debris in the housing bore. |
Additionally, be aware of specific damage types, such as:
- Seal Face Damage: Caused by improper handling or abrasive particles.
- Thermal Shock: Quick temperature changes can lead to cracks.
Addressing these concerns before installation will enhance the longevity and reliability of the mechanical seal.
Installation of the New Seal
Apply Lubrication
Applying lubrication is a critical step in the installation of a single spring mechanical seal. Proper lubrication enhances the initial sealing performance and eases the installation process. To achieve optimal results, follow these guidelines:
- Choose the Right Lubricant: Select a lubricant compatible with the seal material and the specific application conditions, such as temperature and system fluids. This compatibility is essential to prevent degradation of the seal.
- Apply a Thin Layer: Use a thin layer of lubricant on both the seal faces and the outer diameter. This practice facilitates smoother installation and helps achieve a better seal immediately.
Tip: Handling the seal carefully during lubrication is crucial. Avoid excessive force that could damage the seal or its components.
Position the New Seal
Positioning the new seal correctly is vital for ensuring effective sealing. Follow these steps to position the seal accurately:
- Prepare the New Seal: Handle the new seal with care. Ensure it is clean and free from any debris.
- Align the Seal: Position the seal on the shaft with the spring side facing the fluid. This orientation is essential for proper functionality.
- Use a Seal Installation Tool: Employ a seal installation tool to push the seal into the housing evenly. This tool helps maintain the seal’s integrity during installation.
Following these steps minimizes the risk of misalignment and ensures that the seal functions as intended.
Ensure Proper Alignment
Proper alignment of the mechanical seal is crucial for preventing leaks and ensuring longevity. Implement the following techniques to achieve correct alignment:
- Clean the Seal Bore and Shaft: Remove all burrs and nicks from the surfaces. This cleaning prevents damage during installation.
- Pre-lubricate the Seal ID and Shaft: Apply lubricant before installation to prevent dry running, which can lead to overheating and seal failure.
- Protect the Seal Lip: Ensure the seal lip is pointed in the correct direction and positioned properly to avoid damage.
- Start the Seal into the Housing: Begin the installation with a slight rotating motion, ensuring the seal is square to the shaft.
- Drive the Seal to Final Position: Use an appropriate tool to drive the seal into its final position, ensuring it is straight and perpendicular.
By following these alignment techniques, technicians can significantly reduce the likelihood of installation errors that lead to seal failure.
Reassembly of the Equipment
Reattach Components
After successfully installing the new mechanical seal, technicians should begin reassembling the equipment. Start by carefully reattaching all components that were removed during the disassembly process. Follow these steps:
- Align Components: Ensure that each component aligns correctly with its corresponding part.
- Secure Connections: Use the appropriate fasteners to secure each component in place. This step is crucial for maintaining the integrity of the assembly.
Tighten Fasteners
Once all components are in place, technicians must tighten the fasteners. Proper tightening ensures that the assembly remains secure during operation. Follow these guidelines:
- Use a Torque Wrench: A torque wrench helps achieve the correct tightness without over-tightening, which can cause damage.
- Follow Manufacturer Specifications: Refer to the manufacturer’s guidelines for the recommended torque settings. This information is vital for ensuring optimal performance.
Tip: Over-tightening can lead to component failure. Always adhere to the specified torque values to prevent issues.
Verify Assembly Integrity
After reassembly, verifying the integrity of the equipment is essential. Technicians should perform several checks to ensure everything functions correctly. The following table outlines effective verification methods:
| Verification Method | Description |
|---|---|
| Axial and Radial Runout | Check alignment to ensure proper installation. |
| Pressure or Vacuum Test | Confirm the integrity of the seal under pressure. |
| Free Movement Check | Ensure the seal moves freely without excessive friction. |
| OEM Specifications Confirmation | Verify that the seal meets original equipment manufacturer standards. |
Conducting these verification methods helps identify any potential issues before the equipment returns to operation. By ensuring the assembly’s integrity, technicians can enhance the reliability and longevity of the mechanical seal.
Testing the Installation
Start Equipment
After completing the installation of the new mechanical seal, technicians should proceed to start the equipment. This step is critical for verifying the installation’s success. Follow these recommended steps:
- Verify Equipment Dimensions: Ensure that all dimensions align with specifications.
- Check for Shaft Runout: Inspect for any misalignment that could affect performance.
- Use Clean Lubricants: Confirm that lubricants are free from contaminants and inspect for any burrs or damage.
- Follow Manufacturer Instructions: Adhere to the specific torque settings and assembly order as outlined by the manufacturer.
- Ensure Fluid Systems Are Set Up: Verify that flushing, quenching, or barrier fluid systems are correctly configured.
Starting the equipment with these checks in place minimizes the risk of issues arising from improper installation.
Check for Leaks
Once the equipment is operational, checking for leaks is essential. This step ensures that the mechanical seal functions correctly and prevents fluid loss. Follow these best practices for leak detection:
- Inspect the Mechanical Seal: Ensure that the seal is free from cracks or defects.
- Verify Alignment: Confirm that the impeller shaft and bearings are properly aligned, and that gland plate surfaces are smooth.
- Avoid Over-Torquing: Ensure gland plate bolts are not over-tightened to prevent damage.
- Inspect Seal Support System: Check for leaks in tubing connections and ensure proper venting and valve adjustments.
By conducting these checks, technicians can identify potential leaks early and address them before they escalate into larger issues.
Monitor Operational Performance
Monitoring the operational performance of the equipment is vital for ensuring the new mechanical seal operates effectively. Key parameters to observe include:
- Seal Face Condition: Keep the seal faces clean, cool, lubricated, and properly aligned to prevent separation.
- Operational Parameters: Regularly check for excessive heat generation, vibration, and noise, as these can indicate underlying problems.
- Tolerance Levels: Maintain the following tolerances to ensure optimal performance:
| Parameter | Tolerance |
|---|---|
| Radial movement of shaft | < 0.08 mm |
| Axial movement of shaft | < 0.26 mm |
| Stuffing box face squareness | < 0.05 mm |
| Stuffing box bore concentricity | < 0.13 mm |
Regular monitoring helps detect any signs of improper installation, such as loose gland bolts or misalignment, which can lead to premature seal failure.
By following these testing procedures, technicians can ensure that the mechanical seal installation is successful and that the equipment operates efficiently.
Successfully installing a single spring mechanical seal involves several critical steps. To recap, technicians should:
- Disassemble the pump cavity to access the old seal.
- Remove the defective seal carefully.
- Clean the shaft and counterbore thoroughly.
- Lubricate all necessary components.
- Position the new seal correctly.
- Reassemble the pump application.
Following each step carefully is essential. Neglecting any part of the process can lead to seal failure, which may result in costly downtime.
Tip: If uncertainties arise during installation, seeking professional assistance can be beneficial. Professionals offer valuable resources, including installation guidelines and maintenance tips, ensuring optimal performance and reliability of mechanical seals.
FAQ
What is a mechanical seal?
A mechanical seal prevents fluid leakage between rotating and stationary parts in machinery. It consists of two faces that create a barrier, ensuring efficient operation and minimizing maintenance needs.
How do I know if my mechanical seal needs replacement?
Signs of a failing mechanical seal include visible leaks, unusual noises, and increased vibration. Regular inspections can help identify these issues early, preventing further damage.
Can I install a mechanical seal myself?
Yes, individuals with mechanical skills can install a mechanical seal. However, following manufacturer instructions and safety protocols is crucial to ensure proper installation and avoid potential failures.
What tools do I need for installation?
Essential tools for installing a mechanical seal include wrenches, screwdrivers, lubricants, cleaning materials, and a torque wrench. Having the right tools simplifies the process and reduces errors.
How often should I inspect mechanical seals?
Inspect mechanical seals regularly, ideally during routine maintenance checks. Frequent inspections help identify wear and damage early, ensuring optimal performance and extending the seal’s lifespan.
Post time: Feb-22-2026